Showing posts with label food at home. Show all posts

Thursday, April 21, 2011

story-inspired recipes

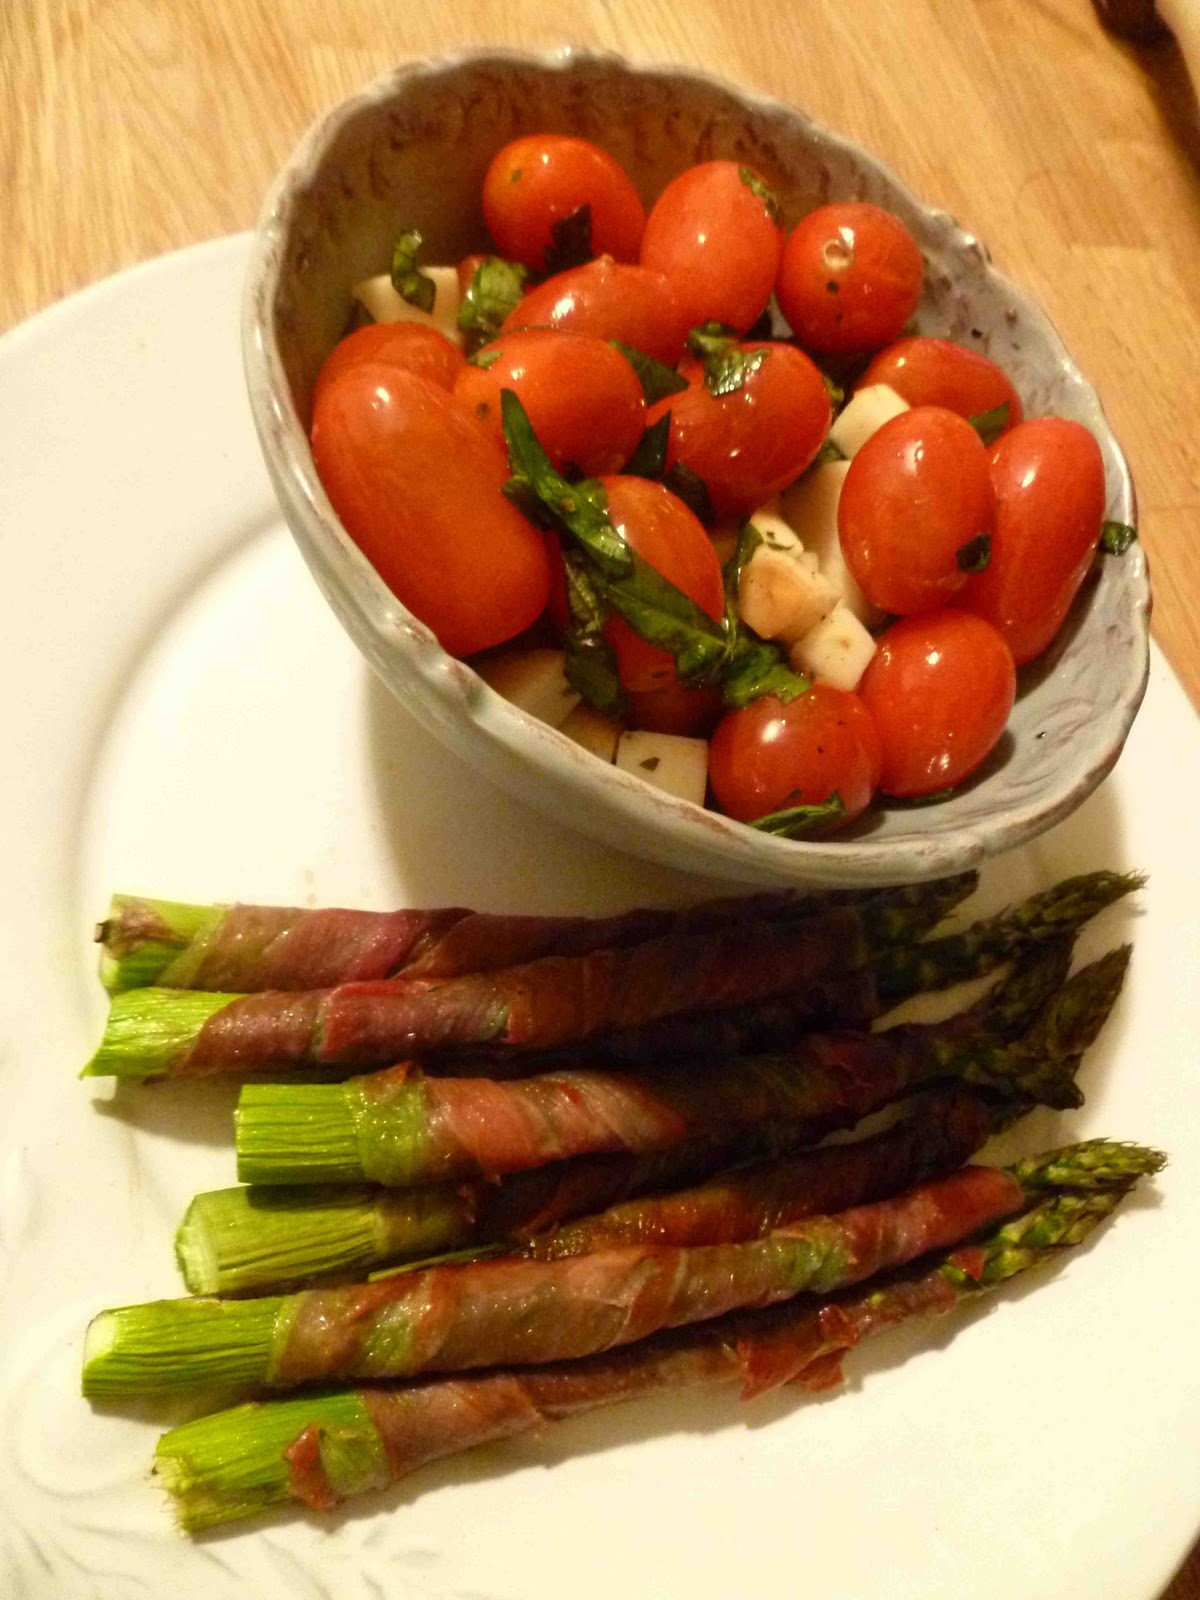
One of the great pleasures of reading for me is having the chance to do some vicarious eating. My husband and I often read at bedtime, and we've discovered that many of the books I read mention food but very few of his ever do. (Hm!) My earliest memory of food in books was Ramona Quimby talking about how her father used to bring home a white paper sack of gummy bears as a treat, and of course reading about Mrs. James Wilder's groaning feasts just encouraged this fixation on food further.

As such, it was only natural that our little children's swap group would do a trade for recipes inspired by children's books. I printed mine at home and included recipes for Anne Shirley's raspberry cordial, Ma Ingalls' vanity cakes, and Mary Poppins' thin, crisp gingerbread cookies.

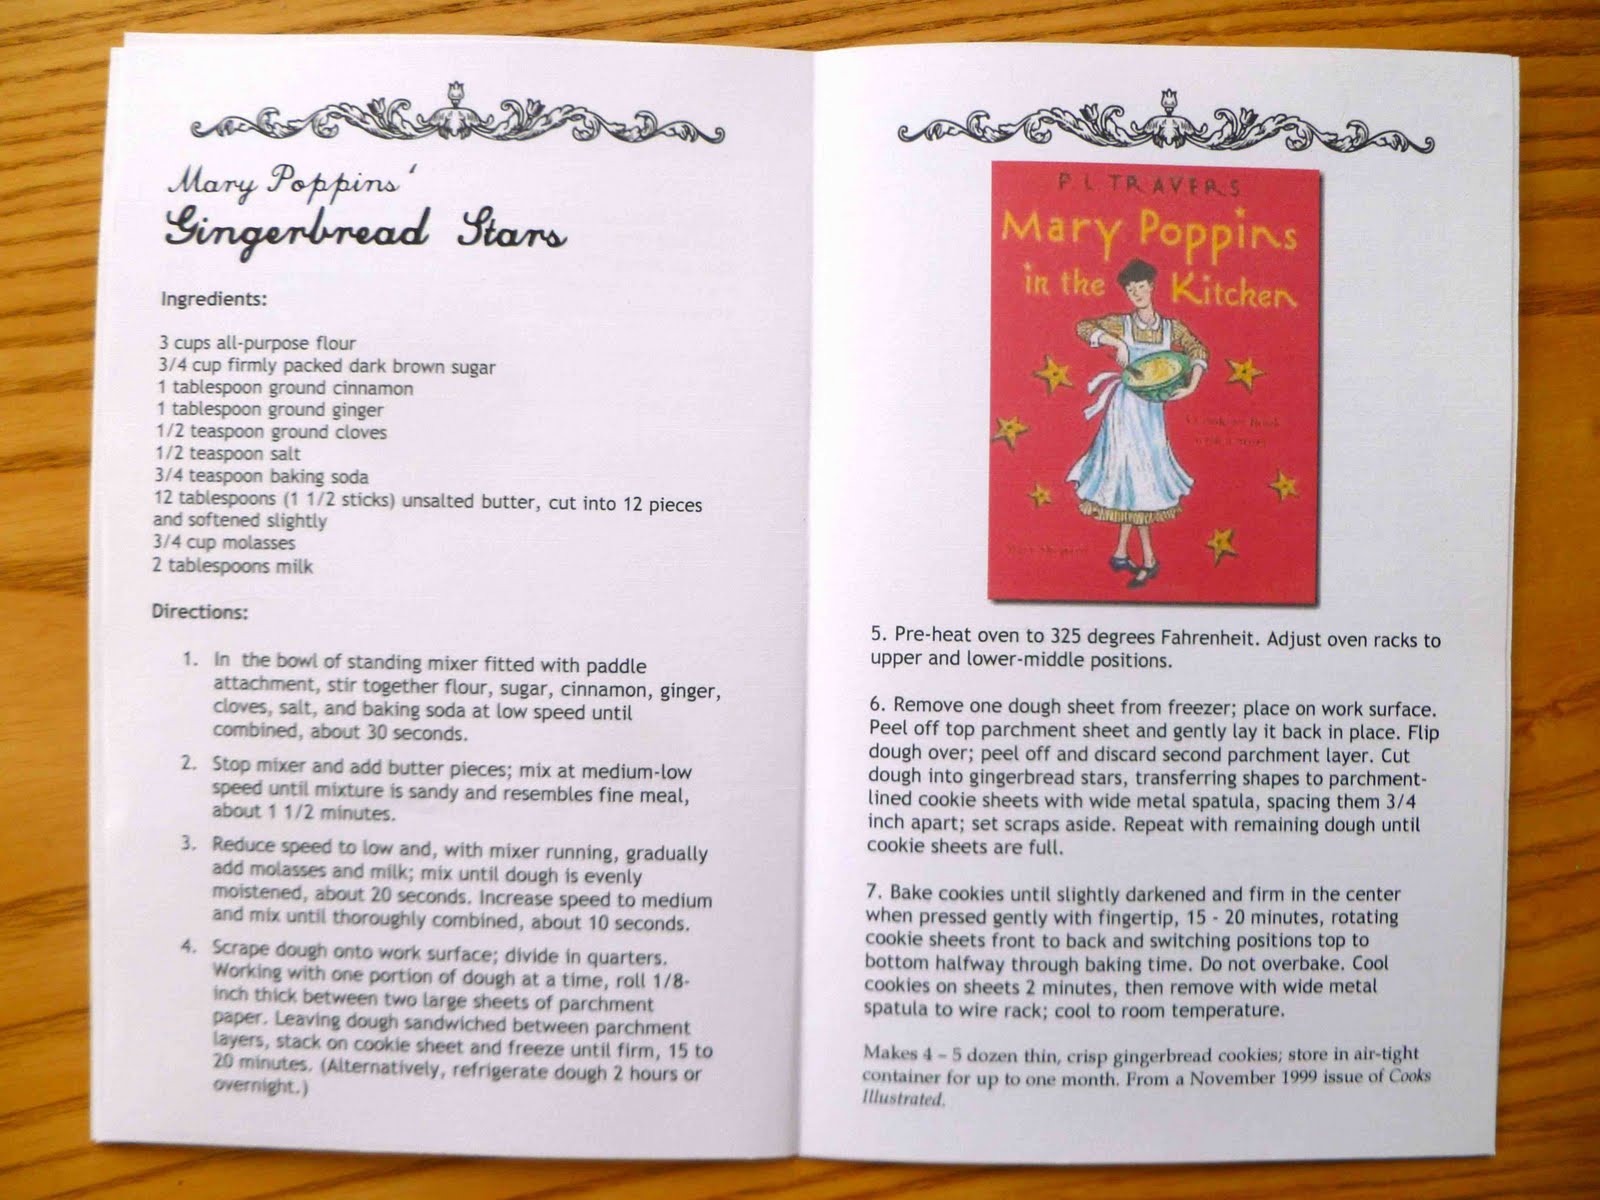
I've always loved the anecdote in Mary Poppins when the children are taken to a gingerbread shop, where they choose cookies wrapped in paper gilt stars. Later on that night, Jane and Michael see Mary standing on a tall ladder pasting the silver stars to the sky with a bucket of glue...amazing! If you watch the film and pay attention to the scene when Mary and the children are headed out for errands, there's a mention of stopping by the gingerbread store, although they don't actually show it in the movie.

I also included a recipe for Chicken and Almond Mousse, a recipe I adapted from the Ginnie and Geneva Cookbook. The Ginnie and Geneva series is one of those gems like the Betsy-Tacy books that I'm surprised more people haven't read. Set in the idyllic 1940s and 50s, the books were similar to the Beverly Cleary books in that they are just everyday stories about a girl growing up and her place in the world. Along the way, Ginnie discovers a love for the kitchen in Ginnie and the Cooking Contest  and runs into various trials and tribulations with deciding what recipe she wants to submit.

When I read the book, I dearly wanted to taste what's described as a "rich, succulent concoction" with "tender white meat of chicken, whipped cream, olives, almonds, and flavoring." It wasn't until 20 years later that I discovered that the author had written a cookbook, and I was so happy to find the recipe for chicken loaf in it. I've posted a slightly altered version below in case you'd like to try it out.

Ginnie Fellows' Scrumptious Chicken and Almond Mousse

Ingredients:


3 egg yolks
1 cup chicken broth
unflavored gelatin
1 tablespoon cold water
1 chicken breast, poached and shredded
1/2 cup almond flakes, lightly toasted
salt
1 teaspoon paprika
1/2 pint heavy cream
pimento olives, roughly chopped

Directions:

Beat the egg yolks in a medium heat-proof bowl with a whisk. Add in the chicken broth.

Bring a pot of water (filled 1/3 of the way) to boil and set your bowl on top for a double boiler effect. Cook the mixture until it thickens, stirring every so often.

Dissolve gelatin packet into a small dish with a tablespoon of cold water. Take your egg mixture off the heat and stir in the gelatin. Add the chicken to the mixture, and season with salt and paprika. Let the mixture cool to room temperature using an ice bath, stirring every now and then so it does not set.    

Using a stand or electric mixer, whip the cream until it’s thick and firm and fluffy. Gently fold the cream into the egg mixture along with the chopped olives, but don’t mix too much or the whipped texture will be destroyed. Pour the mousse into a loaf pan sprayed lightly with vegetable oil.

Chill the mousse for several hours until very firm. To unmold, run a knife around the edges of the pan and turn it carefully over onto a serving plate. 

Adapted from the Ginnie and Geneva Cookbook by Catherine Woolley.

This is a really delicious dish that's easy to do but elegant enough for company, and I highly recommend trying it if you're intrigued. With warm weather coming up, it'll be just the thing for a summer evening with a crisp salad and a glass of white wine. Enjoy!


Sunday, February 27, 2011

oscar menu

It's Oscar night! We went by the Mr. Brainwash mural on La Brea avenue last week to snap photos. I'm kind of hoping Banksy shows up to claim his Academy Award tonight for Exit Through the Gift Shop and announce that the whole thing really was just a hoax.

If you haven't already seen the documentary, I highly recommend it--it's a fascinating and surprisingly funny look at underground street art.

On Friday I suddenly had the urge to do an Oscar menu, so tonight we're having:

Black Swan Wings
Winter's Bone Marrow
The King's Speck-Wrapped Asparagus
Deviled Dragon Eggs
Sean Parker's Appletinis

I was going to make a The Kids Are All Right heirloom tomato salad, but there wasn't a decent heirloom to be had in all four places that I looked today, so we're just having a smoked mozzarella and regular old grape tomato salad instead.

9:00 pm EST: updated with photos! The black swan wings were a little frightening to look at, but that's part of the effect we were going for; I used a marinade of soy sauce, sesame oil, chili oil, oyster sauce, salt and pepper, and a little food dye. I wasn't a huge fan of the rubbery eggs (which I only simmered in the dye for 30 minutes and did not flavor), although the marbled effect looks really cool.


Monday, February 21, 2011

thomas keller's fried chicken

It's been cold and windy here in Los Angeles, so over the rainy weekend, I finally made Thomas Keller's lemon-brined fried chicken. I pretty much stuck to the original recipe, except that I double-dipped the chicken for extra crunch (letting it air dry for an hour between dippings) and I used a mixture of peanut and vegetable oil and butter and shortening since that's what I hand. I know, I know, but I pretty much only make fried chicken once a year, so we don't hold back.

It was deliciously herby and juicy, and we're still eating the leftovers with mashed potatoes. As much as I enjoyed it, however, I have to confess I think I still like my own version of Gourmet's recipe more, though it's a toss-up for my husband. Either way, it's good to have fried chicken options! It took a long time to find the right recipes and the right techniques.

Wednesday, December 22, 2010

holiday cake pops

Last Saturday, I woke up and immediately made a chocolate sheet cake. It's been raining steadily for a week here in southern California, so it was wonderful to smell the heavenly warmth coming out of the oven... and it makes the idea of baking cakes for breakfast very tempting.

This cake was baked for a specific purpose, though...I wanted to make cake pops! I've been wanting to try these for some time, and since we were going to a Christmas party thrown by some friends, it was a good excuse to finally do it. It was fun to discover that they're very easy to make--just rather time-consuming, so they're really mostly for special occasions. I'd actually initially wanted to make cupcake pops but had the wrong cookie cutter on hand. It was just as well, however, since it's good to get the hang of what you're doing with a more simple project the first time out.

I was worried the pops would be too sweet with the candy coating or that there would be cake pop disasters, but everything turned out just fine. I only had a couple of really wonky pops (which, believe me, were not wasted by the pop-maker) and they all tasted great. I'll be posting a fuller review of the fabulous new book Cake Pops  in the new year, and I can't wait to try making pops with more shapes and colors.


Wednesday, December 8, 2010

shopper alert: le creuset sale!

If you've coveted Le Creuset forever but could never bring yourself to pay full price, the factory outlet stores are in the middle of one of their huge (semi-annual, I think?) sales right now. We went Christmas shopping today and weren't planning on buying anything for ourselves, but when you spot the oval 6.75 quart french oven in the perfect Caribbean blue you've always wanted and it's on sale for $129, down from $365, who could possibly resist? Not me! And certainly not more poor husband, who graciously footed the bill. The price is even lower than it is at Home Goods, where I've recently seen a few of the same roasters for $200, although only in a couple of colors.

The factory stores sell "seconds," which essentially means there are minor flaws in the products--mostly in the spraying of the enamel paint. In the close-up photo, you can see the tiny bits of bubbling here and there, which you really don't notice at all. (Although I did, of course, make the nice man at the store take three different ones out of their boxes so I could examine all the finishes.) All the cast-iron still comes with LC's lifetime guarantee, which is pretty amazing. I can't wait to roast something! I'm sure it will be extra delicious because it will be coming out of this beautiful pot.

If you are lusting after Le Creuset for yourself, there are lots of outlet stores all over the U.S. and I'm told the sale will go through the end of December.  Good luck!

Thanks for all your comments on the Modern Top-Down Knitting book giveaway, by the way...there are so many lovely stories to choose from! Don't forget, you have just a couple more days to enter the contest. Such an easy giveaway, and such great prize to win. :)

Thursday, November 25, 2010

thanksgiving

It's just the two of us for the big holidays, but we always cook up a storm anyway--it just means there are more leftovers to eat! Since we're both pretty traditional when it comes to the two big eating holidays, we don't vary the menu too much from year to year, but we enjoy the feast of all-day-grazing just the same. You know the meal is a success when the participants all collapse into a turkey coma, too stuffed full of food to move a muscle.

Wherever you are, however you celebrate...hope you've had a lovely day full of good food, good friends, and good cheer.

Happy Thanksgiving!

Monday, November 15, 2010

savory baked phyllo squares

The photograph isn't that great, but the dish was spectacular. I made Martha Stewart's phyllo squares with baked egg, spinach, and cheese for dinner last night and it was absolutely delicious!

I substituted parmesan for the feta and served it with a side salad. There's something so comforting about breaking into a runny egg, and the combination with the cheeses and flaky phyllo was just marvelous...definitely a dish we'll be making again. With the leftover phyllo I might make croustade aux pommes if it's still in usable condition. Fingers crossed!

Thursday, September 16, 2010

coffee ice cream with candied bacon (yes, candied bacon)

Earlier this summer, Amazon had one of those quickie sales on a Cuisinart ice cream maker. I've wanted one for a long time, and at the crazy price of $32, I just couldn't resist.

For our first concoction, I decided we should make a somewhat basic flavor with an interesting mix-in. I'd read about David Lebovitz's experiments with candying bacon with great interest, and I thought it would be fun to combine that with his recipe for Vietnamese coffee ice cream. Had we gone with a recipe that called for a custard-based cream, we would have had the exciting breakfast combination of bacon, eggs, and coffee in one dessert, but that's neither here nor there.


If you've never had Vietnamese coffee, you must try it at some point. It's made with chicory coffee beans and condensed milk instead of milk or sugar, so there is a very complex, sweet depth of flavor that is absolutely unforgettable. (We introduced one of our friends to it recently, who balked at first over the condensed milk. After tasting it, he sucked his drink down in literally two minutes.) As an ice cream, it's wonderful--icy and deep, with the sweetness rounded out by the coffee flavor and granules.

And the bacon...the bacon! Such an unexpected and fabulously smoky bit of crunch in the middle of all that coffee goodness. Some of our candied bacon was very crisp and on the near-burnt side, while our second batch was much chewier. We had a surprising slight preference for the chewy bacon, though we liked having both the textures in the ice cream.

All in all, an excellent food experiment, and an excellent purchase. We'll definitely be making this ice cream combination again.

Thursday, August 26, 2010

quick chocolate banana pops

For something more appropriate to the season....a simple 3-ingredient dessert using ingredients you might already have in your home.

Frozen blended bananas + honey
slathered in melted dark chocolate =

quickie no-recipe sweet treat.

No yoghurt or milk or ice necessary! Great for those days when you're on the verge of melting from the sweltering heat.

Wednesday, July 14, 2010

japanese ice sphere molds

It's HOT in Los Angeles this week, and I succumbed to my unrelenting desire to own a Japanese Ice Ball mold. I kept reading about how they supposedly kept your drinks colder longer due to the reduced surface area, and how they were coveted by serious mixologists everywhere. Me, I was mostly enthused by the idea of a big frozen spheres floating in my drink.

We weren't in the market for the fancy $200 model that carves out the ice, and even the $16 dual mold at the MOMA store seems a little too pricey. I went for the $12 for 6 spheres option (plus shipping) on eBay, and I'm happy to report that these trays work beautifully.

They're easy to use and take up very little space in the freezer, and will probably replace regular cube trays for us. It takes about 90 minutes for the ball to melt completely in a warm room, so it keeps your drink nice and cool for awhile. Plus there's the terrific side benefit of it being awesomely pleasing to look at.

One tip: be sure to put the frozen ball into your glass and then pour your liquid on top to mitigate the exciting-but-traumatic cannonball effect. Don't ask me how I know.

Thursday, July 8, 2010

salmon rillettes

We had a dinner guest last night, and in addition to salting lemons, I spent the afternoon busily steaming salmon, syruping melons, and pounding chickens.

I tried out this recipe for salmon rillettes from the incomparable David Lebovitz, and it turned out to be the perfectly lemony and fresh summer appetizer we were hoping for.  I added the zest of the lemon as well as its juice, but didn't flake my cooked salmon quite as much as I should have, so it turned out a bit chunky. Still, it tastes very good eaten with thin water crackers or on crostini. Do try it the next time you need an elegant but easy appetizer!

Wednesday, July 7, 2010

preserving lemons

I've had the yen to preserve lemons lately. I've never tasted them, but somehow I'm convinced I would love the combination of lemons and salt and spices and time.

This seems like an absurdly simple thing, with really some patience and just a bit of tending required more than anything else--yet everyone I know who's done it raves about the taste.

So I've gathered a bunch of sunny lemons today with a handful of ingredients and put in them in a big glass jar, where they'll stay for the next month. Seems easy enough, right? We'll see what happens.


Friday, June 4, 2010

spicy mangoes

No-recipe quickie treat, similar to what's sold in fruit stands around L.A.:

sliced mangoes + kosher salt + chili + fresh lime = spicy mangoes.

Enjoy the sweetness and heat at home on any summer day.


Friday, May 28, 2010

carrot cake cookies

We're having a friend for dinner this evening ("Dr. Lecter? Hello? Hello?" hee hee), so I've pre-made dessert: inside out carrot cake cookies! The recipe is from the In Praise of Leftovers food blog, an adaptation of an Epicurious recipe from a few years ago.


I followed Sarah's instructions pretty exactly, except that I skipped the candied ginger and went back to walnuts instead of pecans. The cream cheese frosting with cardamom and honey is insanely delicious--I was so enthused as I spread it on that I somehow ended up running out of frosting for two of the remaining cookies. Oh, well, they'll be good with ice cream, too.

Wednesday, April 7, 2010

root beer float cake experiment

I came across something that sounded amazing recently--root beer float CAKE! The recipe I planned to use was based on the one from this book. All the comments and reactions to this recipe I'd read on blogs were very encouraging, too, and when I tweeted about the find a few weeks ago, the reaction was just phenomenal.

I baked the cake for my husband's birthday yesterday, using Barq's root beer, which I felt was nice and dark and appropriately bite-y. (I really miss my favorite root beer, which is Old Dominion, but unfortunately it's not a brand we have access to on the west coast.) I made very few changes to the recipe and used our fun little castle Bundt cake pan.


And so, after all that...I'm disappointed to say that the recipe wasn't what I hoped it would be. The cake itself is very moist and has great texture, but the flavor of the root beer is very subtle, almost more like an after taste. I've heard that if you use root beer schnapps (or perhaps extract, as recommended on other sites?) the flavor might be stronger. Overall, the cake was nice and sponge-y, but the flavor wasn't very distinct in either the root beer or the chocolate.

The frosting, though was a complete disaster. The butter and cocoa came together just fine, but once the soda went in the whole thing went a little crazy. I had to add a bit more than the 1/4 cup of root beer recommended just to get it smoother, but even so the texture was just unpleasant and much too sweet. It also melted within minutes, leaving behind a soggy, syrupy mess.

If you're interested in trying out the recipe, I'd recommend trying out root beer schnapps or extract, and perhaps use more chocolate, too, for stronger flavor. As for the frosting, I'd recommend using a very good vanilla buttercream, or perhaps a cream cheese or a dollop of Bailey's flavored whipped cream.

I'm not sure I'd venture to try this again, though...I'm now craving deep, rich chocolate cake to make up for this one. Oh well, sometimes these experiments don't work out to your liking. It's just a bigger deal when it's something as crucial as dessert!

Sunday, April 4, 2010

happy easter!

Our household is a little chaotic right now since we're in the middle of packing up for a move. We considered not doing Easter-y things this year because it's a little nutty, but we just couldn't resist the call of the bunny.


My husband and I somehow always manage to stay up realllly late decorating sugar cookies, although this year we finally found very small squeeze bottles that made the adornments much easier. They were also surprisingly easy to fill and clean, just so long as you do it while the royal icing is still liquid.

I also whipped together a pom pom bunny walking her pet Easter chick for our neighbor this year. I made the poms out of baby alpaca wool, used hand-dyed pink felt for the ears and nose, green dotted Bake it Pretty cupcake liners for the dress, a Skippy peanut butter jar lid for the base, and sewed on little beads for the bejeweled leash.

Hope that wherever you are, whatever you're celebrating, you're surrounded by great friends, a loving family, and perhaps even a bunny or two.


Monday, March 15, 2010

candied orange and almond cake

We had friends over for dinner recently, and though I don't normally like to try out new dishes on company, I'd been wanting to make an orange cake for so long I couldn't resist. Fortunately, the candied orange and almond cake I fiddled with turned out to be very tasty, and with plenty of leftovers to have with a cup of tea.

I decided to do a yellow cake recipe with orange zest, and to make candied orange slices to put on top. I'd never candied oranges before, and was surprised at how easy this was to do. I would definitely do this again, just with regular old peels. And perhaps dipped in chocolate.

The recipe below is exactly what I used for the cake, although since I used candied oranges I might cut down a wee bit on the sugar inside the cake next time. The texture will turn out on the lighter, fluffier side, though you could certainly make this with butter instead of oil for a denser cake. The zest makes the batter very orangey, and the cake all by itself with buttercream or a layer of jam in the middle would be perfectly lovely, too.

To Make Candied Oranges:

3 cups water
1 cup sugar
2 navel oranges, sliced crosswise 1/4 inch thick

In a medium skillet, combine the water and sugar and bring to a boil. Add the orange slices and cook over (reduced) moderate heat, turning them occasionally, until the liquid is reduced to a thin syrup and the orange slices are translucent, about 20 minutes. Be careful when you turn them, since you want to retain the shape of the slices. Also throw in any bits of orange peels from ends, removing as much of the white pith as possible.

Reduce the heat to moderately low and simmer until the syrup is thick and the slices are tender but still intact, turning occasionally, about 10 minutes. Transfer the orange slices to a cooling rack. Reserve the syrup and any leftover candied orange bits.

Cake Ingredients:

2 cups sugar
4 eggs
2 1/2 cups all-purpose flour
1 cup milk
3/4 cup vegetable oil
2 1/4 teaspoons baking powder
2 teaspoons vanilla
zest of 2 oranges
sliced almonds
powdered sugar


Cake Directions:

Preheat oven to 350 degrees Fahrenheit.

Line two 9” round cake pans with parchment paper. Grease the paper and the sides of the pan with butter.

In a large mixing bowl, with an electric mixer, beat sugar and eggs together until slightly thickened, about 1 minute. Add flour, milk, oil, baking powder, and vanilla and beat for another minute, just until the batter is smooth and creamy. Don't overbeat. Stir in the zest and pour batter into the prepared baking pans.

Bake in preheated oven for 25 - 30 minutes or until the tops are golden and a toothpick poked into the center of the layer comes out clean. Loosen the sides of the cake from the pan with a thin knife, then turn out onto a rack and peel off the paper. Let cool before evening out the layers.

Place one layer on the bottom of the serving plate. Pour the reserved orange syrup (and candied orange bits) onto the top of the first layer, making sure to cover the entire surface. (Any leftover syrup can be kept for 2 weeks, as toppings for pancakes, yogurt, etc.) Place the second layer on top of the first layer. Arrange the orange slices in a pleasing pattern on top of the cake, and scatter sliced almonds generously all over and sprinkle with powdered sugar.

Enjoy...perhaps with champagne!

Saturday, February 13, 2010

mini orange scones

When you have homemade curd, you must make scones.

With all the snowstorms on the east coast, the tangelo curd my friends sent me in my surprise Valentine package was sent a little later than expected and was a wee bit runny, so I decided to use it as a glaze--although really, the curd was so good I could have eaten it with a spoon. (Have you ever made curd yourself? I never have, but now I'm sorely tempted to try!)

I made some mini orange scones for them and drizzled the sunny orangey-yellow curd over each one. Each bite was meltingly tart and sweet at the same time, and the light, airy scones were just the right subtle base for them. On their own, the scones are quite good too, although I might add more orange zest to the batter if they're unglazed.

Because nothing has to be prepped ahead of time or brought to room temperature, this is a good quickie recipe whenever you want just a bit of a sweet with your afternoon tea. (They're best consumed on the same day that they're made.) Now if only there were clotted cream in the house, too...


Ingredients:

2 cups flour

1 teaspoon salt

4 teaspoons baking powder

1 tablespoon sugar

zest of one large orange

5 tablespoons cold butter, cut into pieces and returned to fridge

3 eggs

1/2 cup heavy cream

1/4 cup fresh orange juice

Directions:

Preheat the oven to 450 degrees Fahrenheit.

Add flour, salt, baking powder, sugar, and zest to a food processor, pulsing a few times to combine. Add the butter and pulse until it becomes the size of peas and looks crumbly.

Beat 2 eggs, cream, and juice together, then add the mixture gradually into the dry ingredients, pulsing gradually until the dough begins to come together and form a ball.

Turn out onto a lightly floured surface and knead a few times, but don’t overwork the dough. Shape the dough into a 3/4-inch-thick layer and use a glass or 1 inch round biscuit cutter to cut out scones. Reshape any leftover dough into another layer and cut out the remainder.

Beat the remaining egg together with a little bit of water, and brush each scone with the mixture.

Bake 10 minutes, or until a light golden brown. Allow to cool on the sheet for 5 minutes, then if you wish, drizzle them with curd or an orange glaze. (Please note: the second photo shows unglazed scones, with the curd in a little container beside them.)

Serve immediately. Makes approximately 24 mini scones.

Wednesday, February 3, 2010

little house books and crafts

I am tremendously fond of children's books, and read just as many of those as I do adult ones. I also have a bookcase of children's books that I re-read every year (and a full room of children's books in storage).

One of my favorites is Laura Ingalls Wilder's Little House series. As a little girl who was a child of immigrant parents, I thought it was great fun to read about a girl whose life experience was so different from mine. As an adult, it's a fascinating--and many ways unparalleled--account of that period of American history.

I've recently discovered that Harper Collins commissioned and printed books based on the other women in Laura's family, including fictionalized accounts of the lives of her grandmother, her Ma, and her daughter Rose. Being naturally suspicious of imitations and fiercely protective of the books I loved so much, I approached these with no small degree of hesitation--but found to my great joy that most of them are very good. It's surprising that most of them are already out of print, but they are still available in libraries and online.

The best of these so far has been the Caroline Quiner, or "Little House in Brookfield" series, which follows the life of Laura's Ma. I confess that in the original books I thought Ma was a bit of a stick in the mud, but I was surprised to find a thoughtful, sweet, and lively child whose life was just as full and interesting as Laura's was. I'm also enjoying the Martha books, which follows Laura's grandmother in her life as the daughter of a laird in Scotland, as well as various other biographies and offshoots of the series. It's striking to see the pioneering spirit that has marked Laura's family history throughout the generations, as well as to see how the authors present the ideals of independence, honor, kindness, and virtue in all the books.

No one who reads the Little House books can be unaware of the important role that food plays in the series, both the desperate want of it and the ongoing desire for it. As a child, I salivated over the rich bounty of American food, which to me seemed to represent both great comfort and luxury. I never really had home-cooked American food until my teens, and I still think of it as something of a treat.

My favorite book in the original series is Farmer Boy, which would vividly describe a long, hard day's work for little Almanzo--followed by the reward of a hot, heartening meal. There's also a great chapter that describes with giddy joy the week when Almanzo's parents go away for the weekend, and the children do nothing but eat big slices of cake with ice-cold milk, home-churned ice cream, icy watermelons cooled in the stream, and chewy, soft pulled taffy.


Reading the Little House books as an adult, particularly in today's era of packaged foods, it's impossible not to feel a deep sense of appreciation for the hard work that goes into harvesting good food by the farmers in this country, as well as in the care and making of meals are put on any table. I was also awestruck and humbled when I realized that throughout the entirety of The Long Winter, in which Laura writes about the terrible blizzards which strike the Dakotas for 7 long months, she never once speaks of being hungry, although the entire family was on the verge of starvation.

I like to keep reminders of two of my favorite scenes in Farmer Boy hanging in our kitchen--two Garth Williams illustrations carefully cut out of vintage books, backed with patterned paper, and hung in simple wooden frames. Most of the artwork in our kitchen has to do with food anyway, and these two were particularly appropriate.


During the winter when it's cold, I really like to read about people who are really cold and really hungry. And then I like to make foods that remind me of the series, including crisp salted popcorn, baked hams, warm pies, hot biscuits, and perhaps even a chicken pie now and then. After all, to this day there are still few things more comforting--or more luxurious--than a good meal.

Tuesday, January 26, 2010

cheddar scallion biscuits

Biscuits! We love biscuits, and this simple recipe yields the chewiest, most tender and cheesy biscuit you've ever tasted. The flavor of the scallions is amazing, subtle but distinct. Even if you've never made biscuits before, you should try making these--they are super easy and super satisfying.

After a couple of days of reprieve, it rained again all day today in southern California, so we're warming ourselves from inside out with limey chicken soup and these fantastic cheddar scallion biscuits. I've adapted the recipe slightly from a Gourmet (tears, copious tears) cookbook recipe, and combined with the soup they make for a warm, comforting meal on a cold, blustery day.

Note: I didn't have buttermilk in the house, so I just put 1 tablespoon of lemon juice in a cup of milk, stirred, and let it set for 5 minutes to substitute. Worked out beautifully. More helpful baking tips can be found here.

Save leftover biscuits--if there are any--to eat with ham for breakfast!

Ingredients:

2 1/4 cups flour

2 1/2 teaspoons baking powder

2 teaspoons sugar

3/4 teaspoon baking soda

1 teaspoon kosher salt

6 tablespoons cold butter, cubed and refrigerated until use

1 1/2 cups cheddar, grated

3 scallions, finely chopped

1 cup buttermilk

3 tablespoons melted butter

Directions:

Preheat oven to 450°Fahrenheit.

In a food processor, pulse together flour, baking powder, sugar, baking soda, and salt. Add the butter and pulse 8-10 times until the mixture is coarse and the butter appears to be the size of peas. Pour mixture into a large bowl, and stir in cheddar and scallions. Add buttermilk and stir until just combined--don't overwork the batter, or the biscuits will be too tough.

Using a 1/4 cup to measure, drop dough in equal mounds 2 inches apart onto a parchment-lined baking sheet. Bake in oven until golden, about 20 - 24 minutes, and brush with melted butter. Serve immediately while they're warm.

Makes 12 large, delicious biscuits.


Related Posts Plugin for WordPress, Blogger...